Sunday, November 16, 2008

photos from 2008 coffee festival


2008 Coffee Festival

Aloha
A big mahalo to all of you who stopped by our booth yesterday at the Kona Coffee Festival and helped to make our day so much fun! Always my favorite part is explaining how to make hypertufa to someone who gets that twinkle that tells me that they may indeed give it a try! It really is an easy craft. No rocket science here. Just play in the mud until you make a bowl or something that makes YOU feel creative. Not a lot of rules with this hobby except of course to clean up all your tools and your work area!

A quick refresher for you who don't want to go looking for your instruction sheet:

one part portland (or hawaiian) cement
one part perlite
two parts peat moss

Add water slowly and mix thoroughly to get that "little wetter than cookie dough but not quite cottage cheese" consistancy.

Put the "mud" in your mold.

Let set in a shady place for a day or two (until you can just scratch the surface with your thumbnail)
release the mold and do a little happy dance!

YOU CAN DO THIS!

Thursday, October 16, 2008

Lots of Tufa!


So we have been busy getting ready for the Kona Coffee Festival. I have several lanterns finished and have added some new designs. One of the things I loved about visiting Japan was seeing the hundreds of lanterns at all the parks and temples. The town of Nara had some of my favorites. It also taught me that you don't have to be too rigid when designing your lantern. I saw all kinds of lanterns from the intricate moss covered ones that towered over me to the "Flintstone" variety that were very rustic and probably handcarved stone. Seeing that allowed me the liberty to "do my own thing" when designing lanterns. If it pleases my own eyes, then all is good. I have learned from online sites that the number of elements in a lantern can be symbollically important. But I also believe that we can each give symbolism to any item. Like the diamond industries campaign to sell a three stone necklace that "represents yesterday, today and tomorrow". Boy, I wonder how many diamonds they sold because of that?! I think that the important thing is to allow yourself to be creative. Find the elements that please you and create your own lantern. That is what I wish to give to all my readers. Permission to be creative. Go for it!

Thursday, July 10, 2008

2008 Coffee Fesitval

I have been invited back to the annual Kona Coffee Festival this year. So barring any unforseen occurances, I will be there once again to demonstrate the "how-tos" of hypertufa! This years event that I will be taking part in is Saturday November 15, 2008. See you there!

Wednesday, June 11, 2008

Craft Shows


Often times people have such great success making hypertufa that they consider selling their items. Go for it! You can sell from your own yard by having an actual "Yard Sale" or you can think bigger and look into the craft fair market.

Choosing the appropriate venue is key when selling any item. When selling "light-weight cement products", remember that most people will not want to be lugging them around all day because, yes they are lighter weight but not actually light weight! With that in mind, you may want to decide on your delivery policy. My first year I sold at a craft fair, I know we would not have been as successful if we would not have delivered the items.

If you live in a tourist driven community, you need to be aware that most tourists do not want to have to box up a large heavy item to haul home with them on an airplane. You will want to look for a venue like a yard and garden expo that will attract locals interested in sprucing up their yards.

Some communities allow roadside vendors, while others will fine you heavily for trying such an atrocity! Check out your local bylaws before jumping in. In most cases you will need to have a business license which can be obtained for around $25 in the state of Hawaii. Prices in other states may vary. You may also have to purchase a vendors license for the day.

Once you choose a venue, you will need a checklist so that you don't leave something vital to your sales at home. Here is the checklist I used when setting up at the Kona Coffee Festival:

2 chairs (although I hardly remember getting to sit down!)
1 6'folding table with custom fit table cloth (I made my table cloth out of dark green sheets. I made it fit over the table with a slit in the back so that I could store things under the table but have easy access.
Risers I use risers to elevate my items to various eye levels. For the risers I used the boxes that I hauled the items in.
Fabric overlays These will be placed over the risers to make an attractive display area.
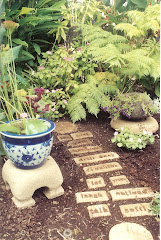
Plants I use plants to dress up my display table and to show how hypertufa items can be used as planters or plant stands. I use poinsettias around xmas time and other plants as seasonally appropriate.
Scissors
Supplies to do a demo: This will include molds, tools, a stepping stone to unmold and carve, gloves, plastic stencils, water jug, tufa ingredients
Bags at my sale I had items besides the tufa to sell so I took recycled bags to put items in.
Tissue paper or newspaper You may need to cushion an item in a box that a customer is taking home.
Receipt pad
Calculator
Guest Book Some people will leave their email addresses with you for you to contact regarding your next sale or a class you may be giving in the future.
Photo album or portfolio This will give people ideas of what you have made in the past and they may place orders with you.
Rubbish bags A no-brainer...leave the area cleaner than you found it!
Cooler with drinks and food You may not have time to even walk over to a food booth to get a bite to eat if you are real busy!
Money belt or fanny pack I want to trust everyone but the fact is that you can not. So keep your money and change on you.
T-pins and safety pins You just don't know what you may need if it gets windy or some other unforseen catastrophe.
Pens and a Pen holder
Wisk broom and dustpan
Business cards
Lots of them!
Hypertufa "How To" sheets The craft fair I did was more of a community service event. I was there to demonstrate a craft to the community. I made sales because as one man told me "I have more money than I do time", so he wanted to purchase items that I had on display. I was willing to take his money off his hands since we both benefitted.

Your venue will also dictate other things you may need. A tent may be required. Do they provide tables? If so what size are they? What are the rules and guidelines of the particular craft fair you are doing? One that I participated in required you to be set up by 9am and to not begin breaking down until 3pm. Make sure you follow the rules.

How much should you take to sell?

This question can never be answered to ones satisfaction, but I try by saying take more than you expect to sell and hope for the best. People don't stop by a booth that has little to show. So take a variety. For myself and the kind of items I make, I would take one large Japanese Lantern, two Tufa Torches, 3 pillars of different heights, 20 stepping stones of different diameter, 3 square planters, 3 Ikebana vases, 2 beach ball pots (to be shown in a future post), and other items of various price ranges. For instance I sell embroidered dishtowels right along side of the tufa at the coffee festival if it has a coffee theme.

Pricing

This is always a difficult subject. How much should I charge for something I made? Well, luckily, the ingredients that go into making hypertufa are very inexpensive. I have found that people in my area willing pay $7-$10 for a stepping stone, $75 for a beach ball pot, and $150 for a large Japanese lantern. Prices will vary by location. If you live in an area where it is common to make crafty things, you may have to ask less than someone who lives in an area where people don't customarily make their own things.

I have found that many people are interested in this product but for some reason they are afraid to try it. Because of that, they will still pay you to make it for them.

Best of luck to you. Please drop me a line and let me know if you have learned other tips to success along your journey.

Bird Bath


If you read my earlier post about the Tufa Torch, this Bird Bath will look quite familiar! I used the same form for the base. I also carved the same Japanese kanji symbol for "peace" into it on all four sides.

The thing that makes this pillar different is that I was experimenting with using alternative organic matter in place of some of the peat moss. In this experiment I used chaff from Kona Coffee Beans which is a papery material, very light-weight. I did have some problems using this material. Instead of the usual 2-3 days for a pillar of this size, it took several days longer to dry to the point of being able to unmold it. This pillar also developed cracks in it and I expected it to break apart but it has been standing in place for 3 years (since 2005) and seems to be holding its own. I like how it has aged. I keep it in a shady area and moss and mold have helped it to take on a very old appearance.

I used the same stainless steel mixing bowl and plastic bowl insert to make the basin.

It attracts birds daily. I often empty it out to get rid of any mosquito larvae but the birds always return.

A Tufa Torch


This was one of my favorite projects. For the base I went to Home Depot found some cardboard cement forms used for making pillars to hold up a deck or other construction projects. They come in 5 or 6' lengths and you just cut them to the desired height when you get home. I can usually get 3 pillars of different heights out of one of the cardboard forms. I carved the Japanese kanji for peace into the pillar using stencils.

I use the pillars in many of my designs. They make great plant stands, bases for lanterns and bird baths

On top of that I used...what else? A stepping stone made from a 14" plastic plant saucer! I rounded the edges so it fit nicely atop the pillar.

The top element is a large bowl shape. To make it I used my huge stainless steel mixing bowl that I make bread in. I first put it inside of a plastic garbage bag to protect it from the cement. Then I dumped the tufa mix into it. When it was fairly full, I put another plastic covered bowl into the big mixing bowl and wiggled it into the center. You always want to make sure that the sides of your planter or bowl is about 2" thick so keep that in mind when you are inserting one bowl into another.

For the candle I was lucky enough to find at Kmart a Martha Stewart item called a smudge pot that is a copper kerosene container with a thick cotton wick. I put sand in the finished bowl and then placed the smudge pot in that and topped it off with little marbles. If you can't find a smudge pot you could substitute votives placed in sand or something similar.

.

A lantern in progress...


Okay, I promised to share some of my mistakes with you so that you don't have to make the same ones...so I am even going to show you this photo! The pic on the left is a photo of recently unmolded lantern elements before any carving and before I realized that I needed to switch up the dimensions of the lantern to make it more pleasing to the eye! The photo on the right was the final product.

First off, I want to share what I used as molds or forms. See the base? This started out as a childs plastic step stool. I basically covered it in thick tufa around all outer surfaces. One leg promptly broke off when I unmolded it. This was not a good idea. Later I had my husband make a box for me that I could fill with tufa. I will include photos of it at a later date.

The next element when going from the ground up was a 14" plastic plant saucer. This is how it looks when it comes out. It will have sharp edges and appear shiny until you rough it up with a wire brush and rasp to shape it.

For the "light box" as they call the part that would hold a candle, I used a plastic container that my Miracle Gro fertilizer came in. I liked the shape because although it was square, it had rounded edges and corners which saved me some carving time later.

On top of that is another 14" stepping stone, but as you can see, it is just too small. It makes the lantern appear squatty and out of proportion. But I only learn by trying it out and seeing how it looks. I later substituted a large plastic plant saucer that was about 20" in diameter as seen in the photo on the right.

How to make a hypertufa stepping stone


So as you can see, I did get my Japanese lantern! But I would recommend that beginners start with something as simple as a stepping stone. The stepping stone is actually used as one of the stacking elements in my Japanese lantern. The lantern in the photo has three different sized stepping stones which I rounded the edges of and carved to make it look more finished. The stepping stone is simple to make and will easily make you feel like a pro from the minute you unmold it.

There are many recipes which seem to work well for making hypertufa. Much like you can change the recipe to chocolate chip cookies and still come out with a decent chocolate chip cookie. But we all seem to have our favorite recipes, don't we? So here is the recipe I have had success with time after time:

I use Peat Moss, Pearlite, and Portland (or Hawaiian if you live in the islands) Cement in a ratio of 2:1:1. That means of course that you will use the same bucket to measure all of the ingredients but you will use two buckets of sifted Peat moss, one bucket of pearlite and one bucket of Portland Cement. It can be a gallon bucket, a 3 gallon bucket, whatever size bucket you have available.

Try to use things you already have around the house. This should be an inexpensive means to create art.

Now just follow my Seven Steps to Success:

**Safety First! Please use a mask over your nose and mouth while mixing dry ingredients together to avoid inhalation. Also, use heavy weight rubber gloves when working with cement. It is caustic and can cause skin irritations.

Now, let's get dirty!

1. In the same bucket that you will be using to measure all 3 ingredients, finger sift the peat moss until it is of a fine consistency and there are no lumps. Remove any sticks or twigs that may be present. Measure two buckets full of the sifted peat moss and dump into a wheelbarrow or large plastic bin.

2. Measure one bucket of the pearlite and dump it into the peat moss. With your hands, mix these two ingredients together.

3. Measure one bucket of cement (do NOT use quikcrete! You are using Portland Cement.) You are wearing gloves now to protect your hands from the chemicals. Break up any clumps or lumps in the mixture.

4. Slowly add water. You don't want to add too much water! Your goal is to achieve a consistency like a cookie dough so that it holds together but when squeezed, only a couple drops of water will come out. Be sure to mix well. This is quite important.

5. Choose your container that will be the mold for your stepping stone. I have found that a 14" plastic plant saucer works great! Line a thin film of plastic (a cheap drop cloth or a dry cleaner bag both work well) in the plant saucer or container of your choice. Smooth out most of the wrinkles in the plastic.

6. Dump the tufa mix into the mold and push down, shake out bubbles and smooth out the surface as if making a mud pie! Cover with plastic and leave it alone for 20-30 hours depending on the humidity. Humid climates will take longer to set up.

7. To test for "doneness", use your thumbnail to see if you can scratch the surface. If you intend to carve in the stone, this would be the window of opportunity to do so. I use plastic stencils for my designs because like I told you, I can't draw! I also use an object like a wood file or a chopstick to do the carving. Use whatever tools feel good in your hand. I often smooth out the rough edges with a wire brush or a rasp.

If you wait too long and the stone is very hard, you can still carve in it using a rotozip and a sander. Hypertufa is a very forgiving medium.

The tufa will take 3-4 weeks to cure fully. For a stronger finished product, keep it covered with plastic and in a shady location during htis process. To assist in leaching the lime from your creation if using it as a vessel to pot plants in, soak in water for a few days.

This is a great art medium for all ages. Be creative and have fun playing in the mud!

A little background about me


Aloha!
My name is Barb Sasaki and I live on the Big Island of Hawaii. Many of you have met me and seen my work while visiting the Kona Coffee Fesitival, in Kailua-Kona, Hawaii where I have been a featured artist in the past and share my knowledge as it evolves because this art form is really so simple that anyone can do it. Each year I handed out over 100 "Hypertufa How To's" and hope that I inspired someone to try this creative and exciting artform.

I grew up believing I was "artistically challenged" but dabbling in this artform opened up many other opportunities to me. I am not your typical "artistic" person. I can't draw. I don't paint. But becoming a hypertufa artist doesn't require those skills.

I became interested in hypertufa several years ago when I decided that I wanted a Japanese lantern in my yard but didn't want to pay $300 to get one. I started talking to people and heard the word "hypertufa" for the first time. I had no idea what it was and how learning about it would impact my life.

I started reading everything online that I could on the subject. The best information for me was found on the gardenweb.com site. I was able to learn from others mistakes which saved time. After about 4 days of reading all the forum posts, I just decided to dive in.

The photos at the top of this post are of my first attempts of hypertufa artistry.