
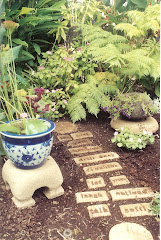
So as you can see, I did get my Japanese lantern! But I would recommend that beginners start with something as simple as a stepping stone. The stepping stone is actually used as one of the stacking elements in my Japanese lantern. The lantern in the photo has three different sized stepping stones which I rounded the edges of and carved to make it look more finished. The stepping stone is simple to make and will easily make you feel like a pro from the minute you unmold it.
There are many recipes which seem to work well for making hypertufa. Much like you can change the recipe to chocolate chip cookies and still come out with a decent chocolate chip cookie. But we all seem to have our favorite recipes, don't we? So here is the recipe I have had success with time after time:
I use Peat Moss, Pearlite, and Portland (or Hawaiian if you live in the islands) Cement in a ratio of 2:1:1. That means of course that you will use the same bucket to measure all of the ingredients but you will use two buckets of sifted Peat moss, one bucket of pearlite and one bucket of Portland Cement. It can be a gallon bucket, a 3 gallon bucket, whatever size bucket you have available.
Try to use things you already have around the house. This should be an inexpensive means to create art.
Now just follow my Seven Steps to Success:
**Safety First! Please use a mask over your nose and mouth while mixing dry ingredients together to avoid inhalation. Also, use heavy weight rubber gloves when working with cement. It is caustic and can cause skin irritations.
Now, let's get dirty!
1. In the same bucket that you will be using to measure all 3 ingredients, finger sift the peat moss until it is of a fine consistency and there are no lumps. Remove any sticks or twigs that may be present. Measure two buckets full of the sifted peat moss and dump into a wheelbarrow or large plastic bin.
2. Measure one bucket of the pearlite and dump it into the peat moss. With your hands, mix these two ingredients together.
3. Measure one bucket of cement (do NOT use quikcrete! You are using Portland Cement.) You are wearing gloves now to protect your hands from the chemicals. Break up any clumps or lumps in the mixture.
4. Slowly add water. You don't want to add too much water! Your goal is to achieve a consistency like a cookie dough so that it holds together but when squeezed, only a couple drops of water will come out. Be sure to mix well. This is quite important.
5. Choose your container that will be the mold for your stepping stone. I have found that a 14" plastic plant saucer works great! Line a thin film of plastic (a cheap drop cloth or a dry cleaner bag both work well) in the plant saucer or container of your choice. Smooth out most of the wrinkles in the plastic.
6. Dump the tufa mix into the mold and push down, shake out bubbles and smooth out the surface as if making a mud pie! Cover with plastic and leave it alone for 20-30 hours depending on the humidity. Humid climates will take longer to set up.
7. To test for "doneness", use your thumbnail to see if you can scratch the surface. If you intend to carve in the stone, this would be the window of opportunity to do so. I use plastic stencils for my designs because like I told you, I can't draw! I also use an object like a wood file or a chopstick to do the carving. Use whatever tools feel good in your hand. I often smooth out the rough edges with a wire brush or a rasp.
If you wait too long and the stone is very hard, you can still carve in it using a rotozip and a sander. Hypertufa is a very forgiving medium.
The tufa will take 3-4 weeks to cure fully. For a stronger finished product, keep it covered with plastic and in a shady location during htis process. To assist in leaching the lime from your creation if using it as a vessel to pot plants in, soak in water for a few days.
This is a great art medium for all ages. Be creative and have fun playing in the mud!


2 comments:
Could you cut out the shape in ground (we have lots of clay dirt) and use the ground mold for the hypertufa stepping stones? This might be a lazy way, but it would be right in place and I could make the the shape I wanted.
I was just wondering that. I don't know why that couldn't be done. But then, I have only begun thinking about making some of these hypertufa things.
Post a Comment